Thank you for choosing Realize theme.
Realize is a Hubspot CMS theme designed to be an effective tool for productive marketing teams.
It is very easy to setup and learn how to create your unique pages and once you create your first two or three pages, everything else will be easy and enjoyable.
Realize Theme comes with three types of templates:
After installing theme all these templates should be available on your HubSpot portal.
To set website pages or landing pages, open Marketing/Website Pages or Marketing/Landing Pages, click Create, and then choose one of the templates.
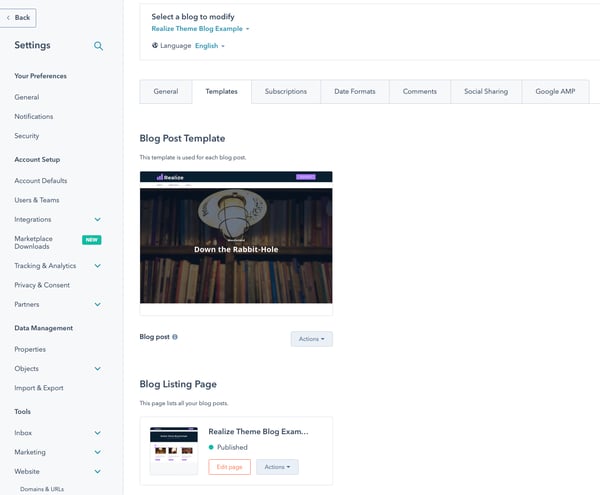
You can set blog template in Settings/Website/Blog/Templates.
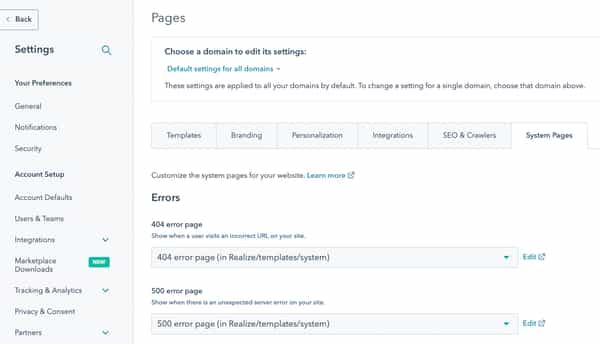
You can set system pages template in Settings/Website/Pages/System Pages.
All the page templates of Realize theme contain global Header and Footer that you can customize or just remove from specific pages.
If you want to create a landing page with a unique header (or footer) you can remove global header/footer modules and add instead modules called Header Local or Footer Local.
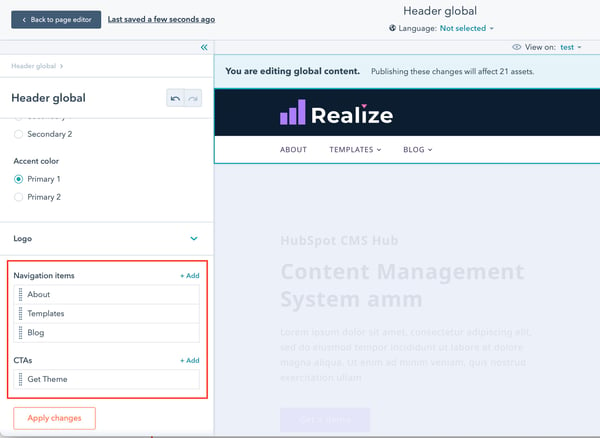
You can set a menu in a header (global or local module):
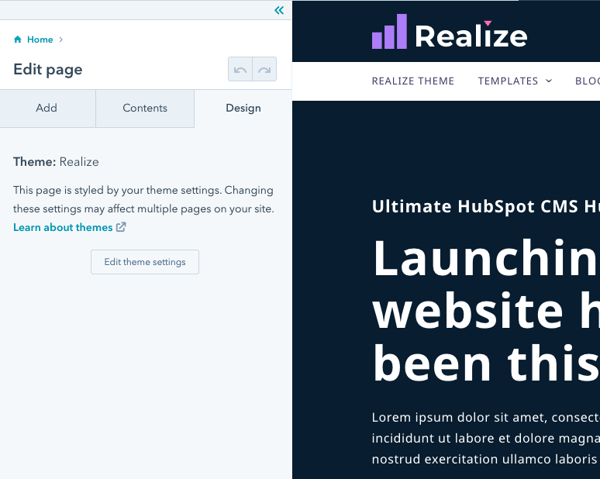
Set the brand color palette and pick fonts for all of your pages by accessing theme settings right from any page.
Click the Design tab / Edit theme settings to open the set of fields responsible for colors, typography, button and form settings, etc. These settings will be applied to all of your website, landing and blog pages.
Use Text – 1 column module to set the section heading and specify its type.
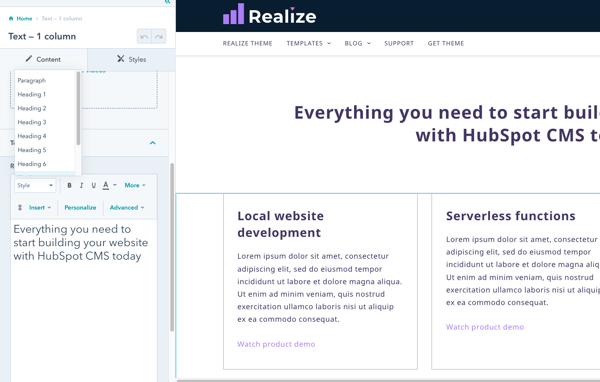
We use the 12-column grid system to style the content. It means the content always consists of 12 equal units.
When editing module styles in Styles tab, set 'Width to container' for each content item to tell the number of columns the items should take up.
In the example below we give the text the width of 1/2 container, which equals 6/12. And the image takes up 5 of 12 columns.
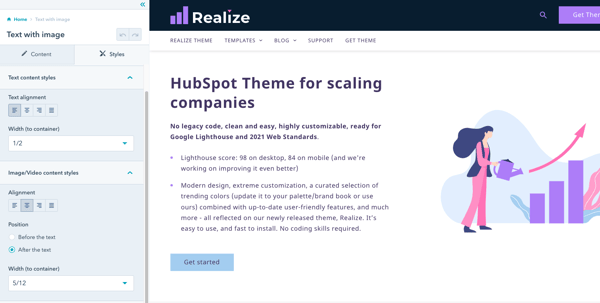
Prefer to position one element above the other? Simply give either of them the full width.
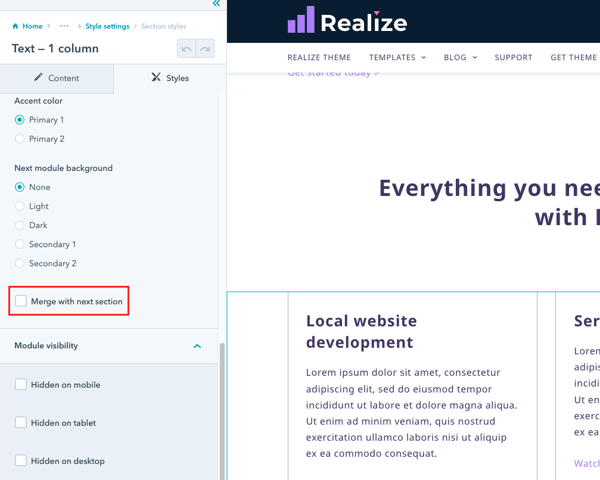
Set the vertical paddings to the smallest but it's not enough? Reduce the spacing between the modules by merging two together.
To do that, toggle 'Merge with next section button' in the Styles tab/Section settings of the module that comes first. Background of both sections should be the same.
Option is available in every module.
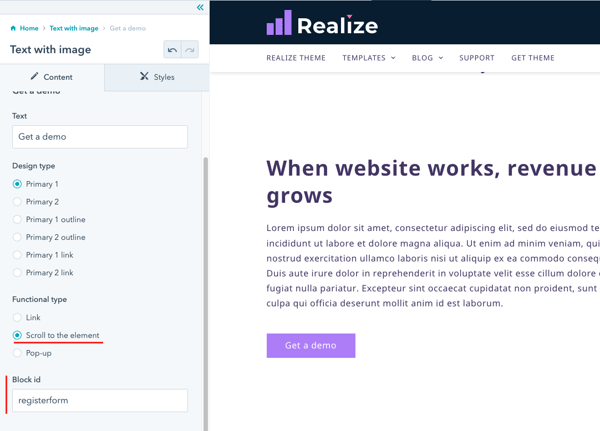
You can add an anchor link to a CTA with scroll effect on your landing page.
Find the 'Section id' field in the Content tab of the module you want to have a scroll to, and set the id. The id will be used as a reference to the module.
Go to the CTA that you want to add a link to. In the settings select its functional type 'Scroll to the element' in order to paste the module id.
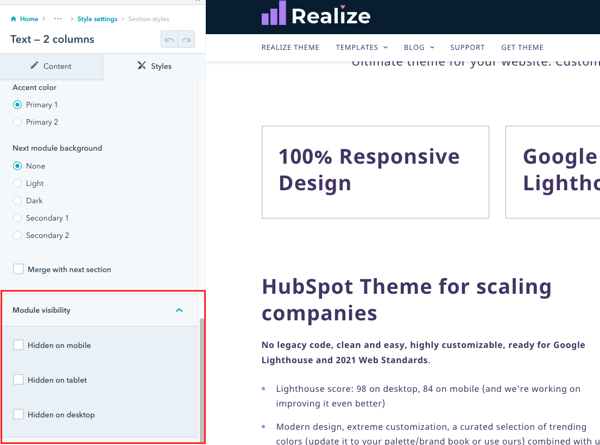
Hide certain modules for particular devices when consider them to be less important for a user.
Change module's visibility in Section settings to hide a module when viewed on desktop, tablet or mobile.
Didn't find an answer? Please contact us if you have issues or new requests
Submit a Ticket/Request